Lindt HELLO SALTED Caramel & Sweet POPCORN | Review

9.12.14 Unknown 1 Comments


Lindt Hello Salted Caramel and Hello Sweet Popcorn

Finally it's this time of the year, when I get the chance to restock my drawer full of sweets and not getting blamed for me wishing for a whole load of chocolate. It's not that I have a problem with me stuffing myself with tiny bits of deliciousness, I'm really enjoying every bite. I can store one package for months and eat it slowly bit by bit.

But I'm not here to spill out all my craziness on you... Let's talk about my newest findings, which are two of the latest Lindt chocolate bars. Their series of HELLO chocolate bars is dedicated to young chocolate lovers and provides a bunch of classic treats mixed into milk chocolate. I personally found the Strawberry Cheesecake one to be my favourite.

a piece of Lindt Salted Caramel with dripping caramel

So I've bought two of their newest HELLOs, SALTED Caramel and Sweet POPCORN. Maybe you've read my Review on the Lindt Creation bar, which I had excpected very much from and got me so little... So I wasn't as enthusiastic about these two.
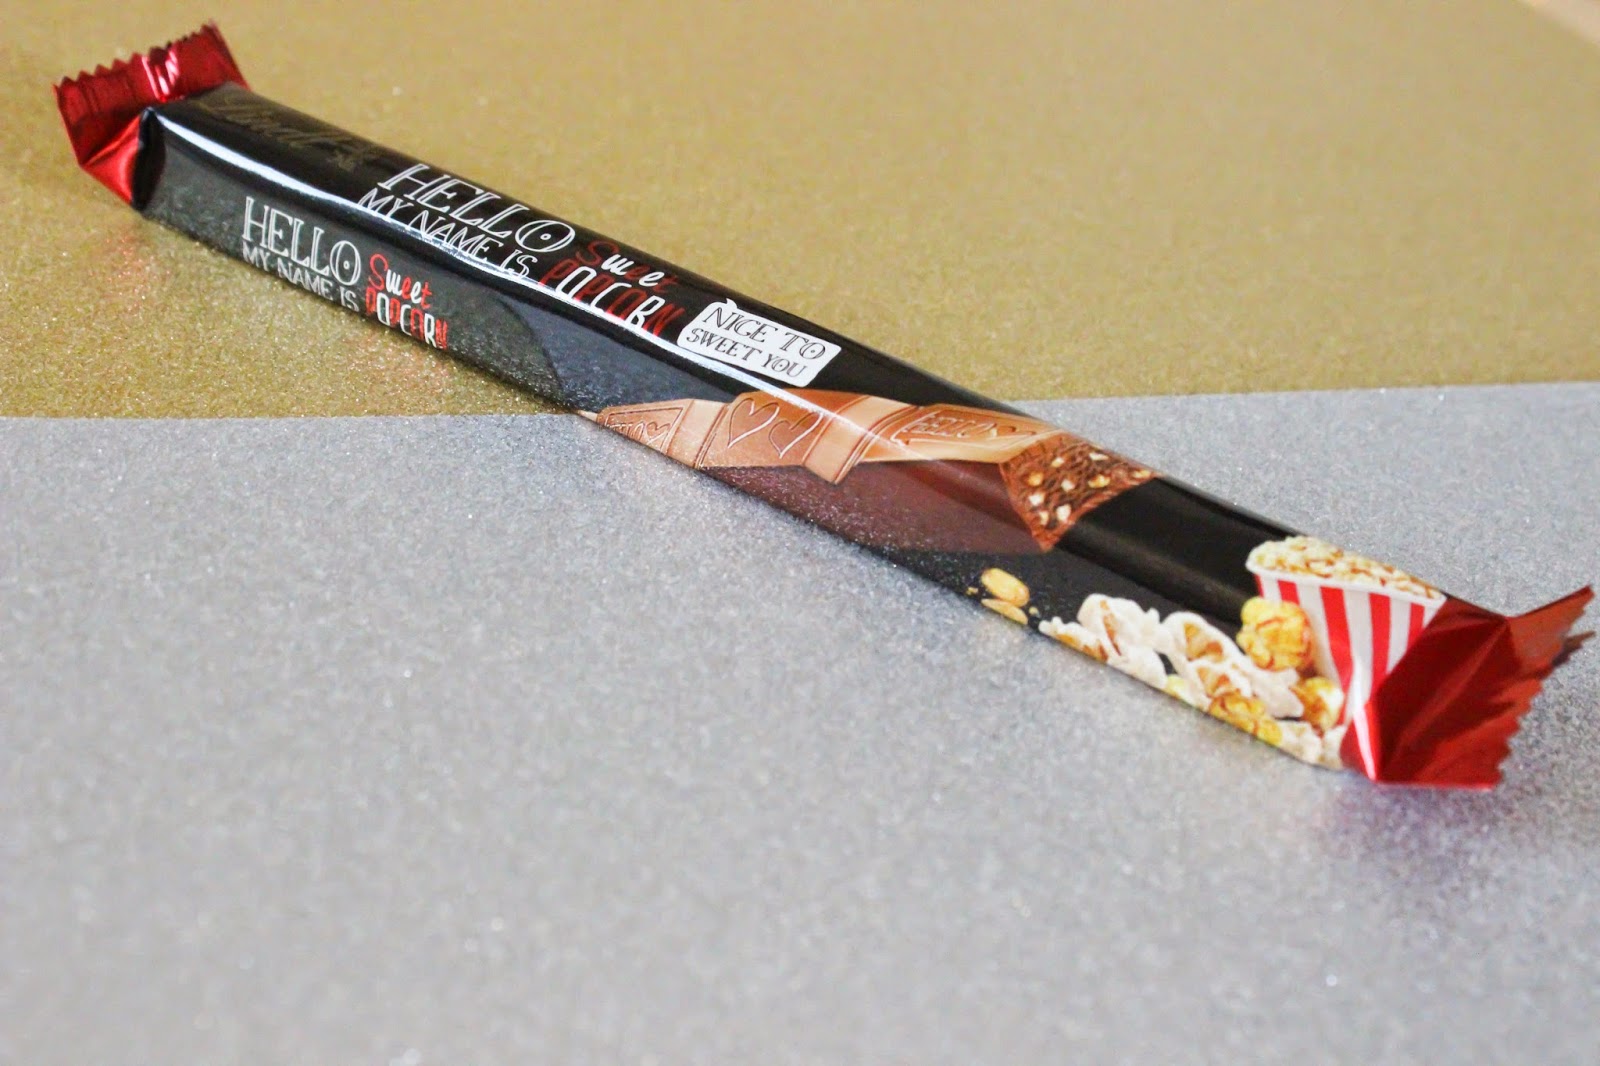
Let's start with Sweet POPCORN. This chocolate stick provides solide pieces of chocolate with just tiny bits of popcorn. The popcorn bits are really crunchy and blend well into the chocolate as you let it melt in your mouth. It tastes delicious, but not spectacular. I'm not quite sure if I would repurchase, because it's a bit too pricey.
So let's move on to SALTED Caramel. This one surprised me a lot. As I took a first bite, the caramel started to nearly float towards me. I wouldn't really describe it as creamy. It's more on the liquid side. And that's a biiiiig plus! The salty taste is just right for this chocolate-caramel mixture. I can definitely say that this is one of my favourite chocolate bars so far.

What's your favourite Christmas treat?


Thank you for reading!

Have a nice day!


1 Comments:

Bow Box | Gift Idea

24.11.14 Unknown 2 Comments

decorative box with some hair accessories in it

focus on some of the hair accessories, a red bow clip and a semi-transparent black bow clip

the closed box has a bow itself on its lid

Since I usually start buying Christmas presents in summer, I'm quite late for it this year... which is making me more nervous rather than creative. This is exactly why I'm open for all the pretty and quick gift ideas on the internet. The gift idea pictured above is one of my own: the bow box.

For this idea I got inspired by a lovely youtube family I've been watching since last year. The SacconeJolys have a toddler girl, Emilia, who uses to store her hair bands in a box. She always gets excited about her variety of bows. It's a wonderful gift idea for little as well as big girls. So if you know a friend who loves any kind of hair accessories, it might be perfect.

First you choose a stable decorative box. I bought one which was really cheap yet perfect for my intentions as it has a bow attached to the lid. Of course you can also pretty up some old regular box on your own by covering it in wrapping paper. Make sure it's reusable! Now you fill the box with various hair accessories your friend might like. Let some space for additional ones!
The best part about this present: You don't have to actually wrap it.


What quick and easy gift ideas do you think of using this year?


Thank you for reading!

Have a nice day!

2 Comments:

Clinique vitamin C lip smoothie | Review

10.11.14 Unknown 10 Comments

on the left: 12 peach power  |  on the right: 05 mango-thon


It's again this time of the year when my lips are as dry as they can get and feel like some sort of sandpaper. That's when I try to avoid using any kind of lip colour as most of them look ridiculous on chapped lips. ...until I casually came across the Clinique vitamin C lip smoothies. I had the opportunity to try them in the shop and immediately fell in love. I bought the colour mango-thon for myself and peach power for my sister. You can see me wearing my "smoothie" in the picture above. It resembles the actual colour of my lips and just adds some perfection to them. :)

But these lip smoothies aren't all that perfect to handle. Before first using one, you have to twist its back end and hear it click several times as it pumps the colour into the brush. I was a bit worried that mine would be broken, because it takes a long time for the lip colour to reach the surface. Its consistency is really sticky so it's not that easy to apply and unfortunately there's a lot of the product left in the brush every time you use it. 

The benefits are amazing. As soon as I apply this product to my dry lips they start feeling soft and smooth (maybe that's where the name comes from. haha). It's the best feeling ever. It claims to have vitamin C and antioxidants in it which also help improve the look of your lips maybe even for a longer term. The colour is simply beautiful. It's a sheer coat on your lips which lets your actual lip colour shine through in its best way.


What do you use to cover your dry lips?


Thank you for reading!

Have a nice day!

10 Comments:

Simple Hair Bow Tutorial

19.10.14 Unknown 4 Comments

You may all know these annoying straps that are attached to the inside of your shirts or dresses. They once served a purpose, which was to hold your piece of fashion in place while arranged on a hanger in a shop. I'm now assuming you don't always use them the same way at home... Since I don't do that either. :)

So after losing their initial purpose, the next thing they do is hanging out, when they are really not supposed to. I always end up sticking them back in or have friends reminding me to do so. To finally stop that annoyance, let's now take some scissors and do something useful!

If you look closely, you will recognise that these straps are of quite good quality. You can use them for whatever you want. Be it accentuating a piece of room decor or adding some cuteness to a self-made gift card. In our case we'll make some delicate hair bows.


After releasing the straps from a shirt, make sure to seal the ends with clear nail polish. This will prevent them from fraying. Now spot the centre and bind a simple bow. Take a hair pin and tuck it into the knot. Did you know, that the wavy side of the pin is supposed to be closest to your head? This way it provides better grip.

If you don't want to rebind it over and over, you can simply fixate the knot with the clear nail polish or some glue. The hair bow is very subtle and will always match at least the shirt you cut it from. ;)


What kind of hair accessories do you wear?


Thank you for reading!
Have a nice day!

4 Comments:

YSL nail laquer 8 FUCHSIA CUBISTE | Review

11.10.14 Unknown 0 Comments


I have to admit, that I'm a little obsessed with nail polish. I have a huge collection of mostly rather cheap nail polishes in various colours. I know, that I will never be able to empty even a single one of them, but that's why I share them with my sister and even some of my friends. I just love the creativity you can put into nail art. You can also just show your current mood with a simple colour you chose or cherish the presence of a new season.

One of my sister's childhood friends is a beautician now and gave us the opportunity to try one of her expensive nail polishes. She uses the Yves Saint Laurent La Laque Couture Nail Lacquer for work. I personally wouldn't have bought it myself as it's too much money for an occasional usage in my opinion... But I tried it anyway. :)

This nail polish is in the colour #8 FUCHSIA CUBISTE, which I think is gorgeous. It's a burgundy shade, that changes with different lighting. When the sun shines on your nails it's very light (like on the picture above). In a candle light situation it would be rather dark. I think that's due to the fact, that there's only one coat on my nails, which is amazing! This nail polish gives the highest coverage and perfect coloration after applying just one coat!

Applying this nail polish was the easiest thing ever. It's consistency is creamy, but not too thick. The flat brush enables a perfect application with just one stroke. 
----> It's like the nail polish of my dreams already!

Although there are so many positive things to say about this product, there is still something to complain about... After drying really quickly, i wanted to apply a top coat to my nails. When I was trying to cover my nails, I realised that the colour went onto the clear brush. So I instantly stopped and thought, I'd rather see how long the YSL nail polish would stay on my nails without a top coat. I can tell you, these were some hard days... My nails transferred the colour onto everything I accidently touched with them.
Besides that I was very pleased by how long-lasting this nail polish was. The picture above was taken on the fifth day.

I personally think the pros outweigh the cons. Maybe I'll buy one of these someday. ^^


What do you think about high-end nail polishes?


Thank you for reading!

Have a nice day!

0 Comments:

Essence HELLO AUTUMN Nail Polish | Review

1.10.14 Unknown 12 Comments

nail polish 03 CHARLIE SEEN IN GREEN and 02 MEET MY PUMPKIN  |  lip cream C01 beauti-FALL red


So I've been living with this nail art for three days, when I realized something that freaked me out. A friend of mine was interested in my nails and I started telling her, what I used to achieve this style. So I also mentioned the pea green nail polish, that was my base. ...and that was when she got curious and told me, that it obviously wasn't green, but yellow. While I kept telling her that I definitely bought a green nail polish, I remembered, what the label on the packaging said: thermo effect.

Each nail polish out of the HELLO AUTUMN collection by Essence provides this magical effect. They change colour with the temperature of your nails ...or fingers. :)
The day I had bought it, I didn't really believe in a visible effect. But it really is stunning. My hands are usually quite cold. So the colour has always been more on the green side of the colour palette. When I met my friend it was a quite hot day so it turned yellow. To show you the difference I held one of my hands under cold water (I'm such a hero).

Ever since my friend drew my attention to my magical nail polish I can't stop looking on my nails regularly to see if they have changed again. And they really do! I've even bought a second colour and a lip cream from this collection. I don't think I have ever been that impressed by a makeup product.


Have you ever bought a special effects makeup product? Did it work?


Thank you for reading!

Have a nice day!

12 Comments:

Falling Leaves | Autumn Nail Art

27.9.14 Unknown 6 Comments


Autumn has to be my favourite season. It's not too hot, and not yet too cold... At least not normally. :) You can wear clothes in layers and there are beautiful warm colours everywhere. 

So I'm really into autumn nail art to celebrate my love for this wonderful season. And I'd really like to share that with you. This tutorial is really simple. You don't have to be an artist or accurate in any way. When you watch the video, you'll see, that the finished look seems a bit messy. I always leave my nails like this, because it washes off after at most two days anyway.


What do you love about autumn? What do you probably dislike?

Thank you for reading!
Have a nice day!

6 Comments:

Loving Watercolour Pencils

19.9.14 Unknown 4 Comments


You can watch me drawing the blue tit on youtube!

I have always loved using pencils for colouring pictures. They are really easy to handle even though it can be frustrating when you sharpen them and they tend to break... ^^
As a child you usually have the waterproof pencils, which don't react to water at all and so did I. You can alter their intensity by using different levels of pressure. And a skilled person even knows how to mix different colours. 

Mixing colours is a lot different with watercolour pencils. They blend so well when they get exposed to water. It's wonderful to watch the colours getting brighter as you move the brush. You could say: "Why aren't you just using watercolours in the first place?" And here is where I point back to the accuracy that pencils can provide. You can place every streak exactly where you want it to be. Of course watercolour paintings can be detailed too. But it's so much easier with watercolour pencils. :)


Have you ever tried using them?

Thank you for reading!
Have a nice day!


4 Comments: